The Final Race!
Table of Contents:
- 1. Deadline
- 2. Problem Statement
- 3. Attempt Termination
- 4. Scoring Criterion
- 5. D-Day of the Competition
- 6. Implementation
- 7. Submission Guidelines
- 8. Allowed and Disallowed functions
- 9. Grading
- 10. Collaboration Policy
1. Deadline
11:59PM, Monday, December 16, 2019 for report and video submission.
YOU ARE NOT ALLOWED TO USE ANY LATE DAYS FOR THIS PROJECT!
2. Problem Statement
Congratulations for making this far into the course. We know that you’ve worked very hard to get here and learnt a lot of new concepts along the way. Now, it’s time to put everything together. The aim of this project is to win the race on an obstacle course which utilizes all the algorithms you built from projects 1 through 4.
Remember that your PRGHusky comes with a suite of sensors, a front facing RGB color global shutter camera, a down facing stereo grayscale camera with an IMU along with the SONAR on-board and odometry estimates from the bebop_autonomy package. You can use any/all of the sensors to complete the course as quickly as you can. Also, the structure of the track (obstacle course) is known before along with a prior on pose of the obstacles as a gaussian distribution. An overview of the track is shown in Fig. 1.
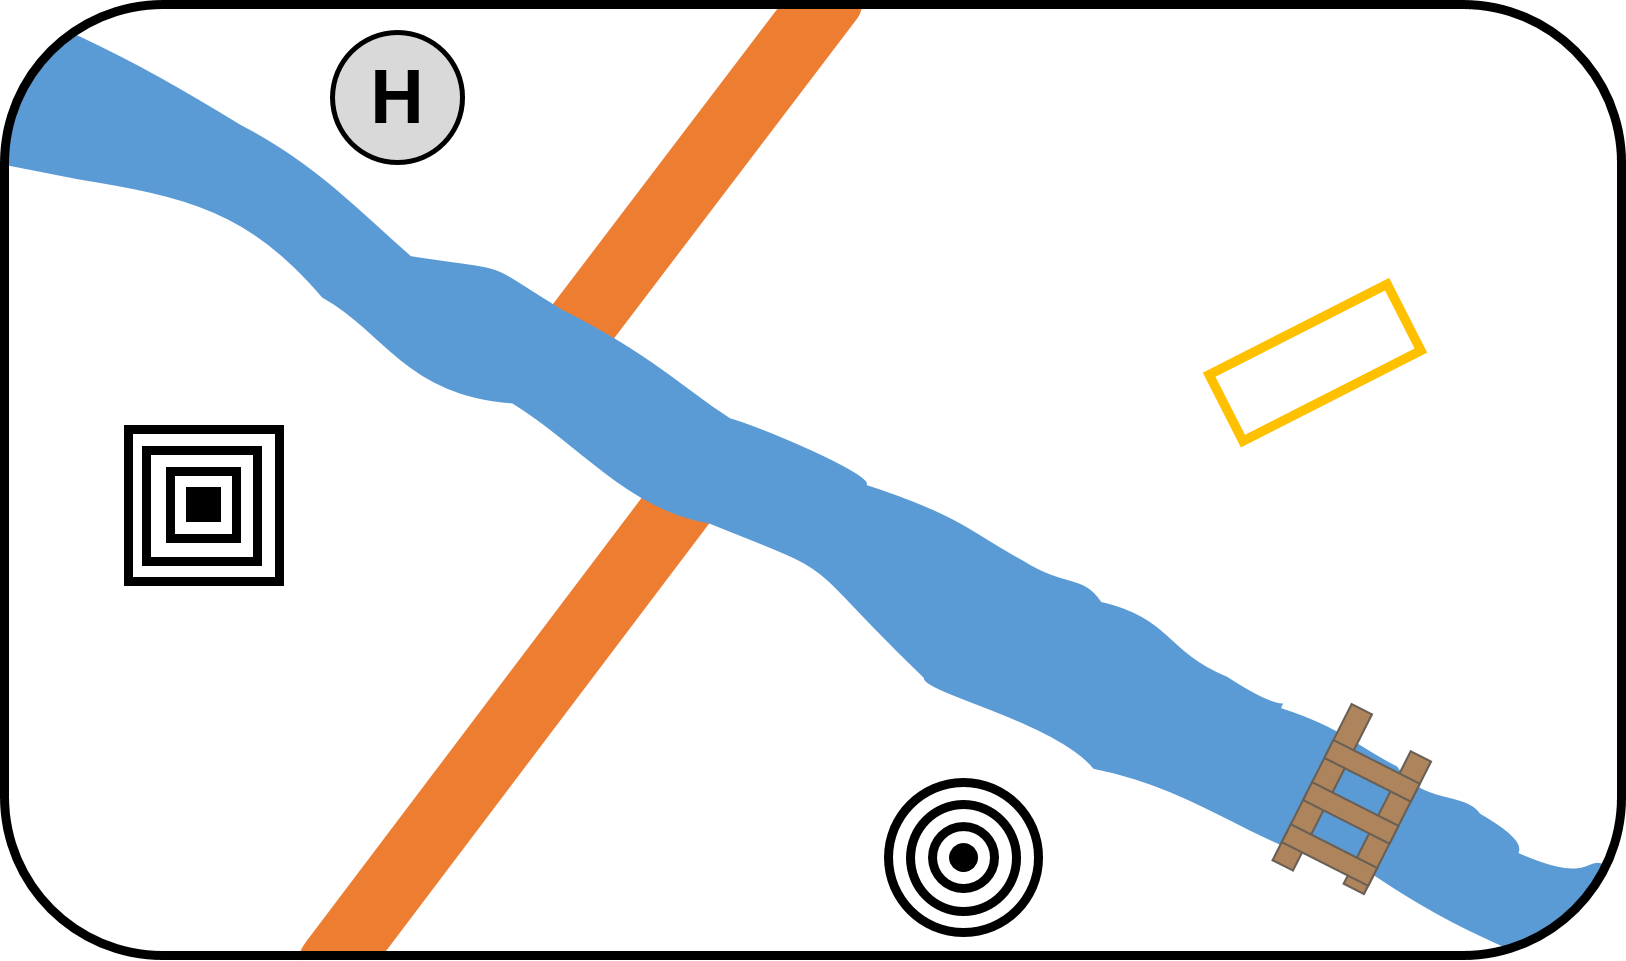
The track contains exactly six stages. Description of each stage is given next.
2.1. Wall
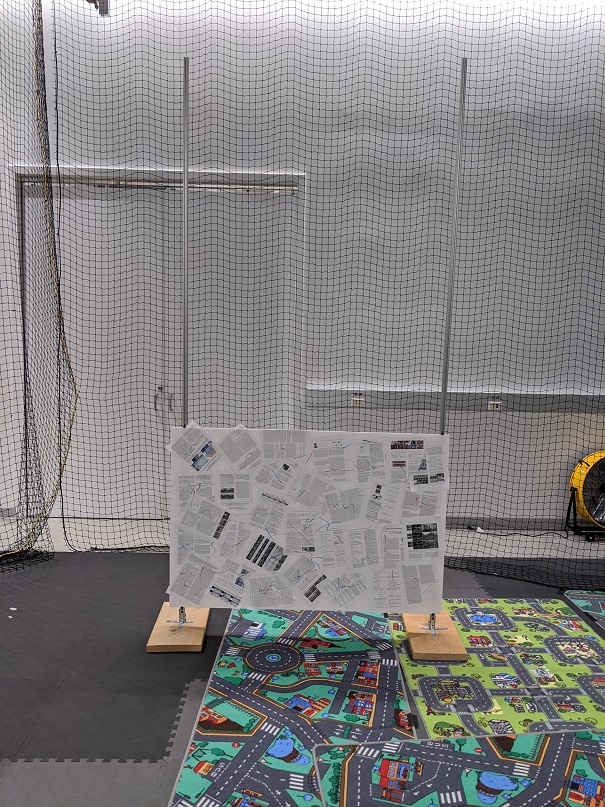
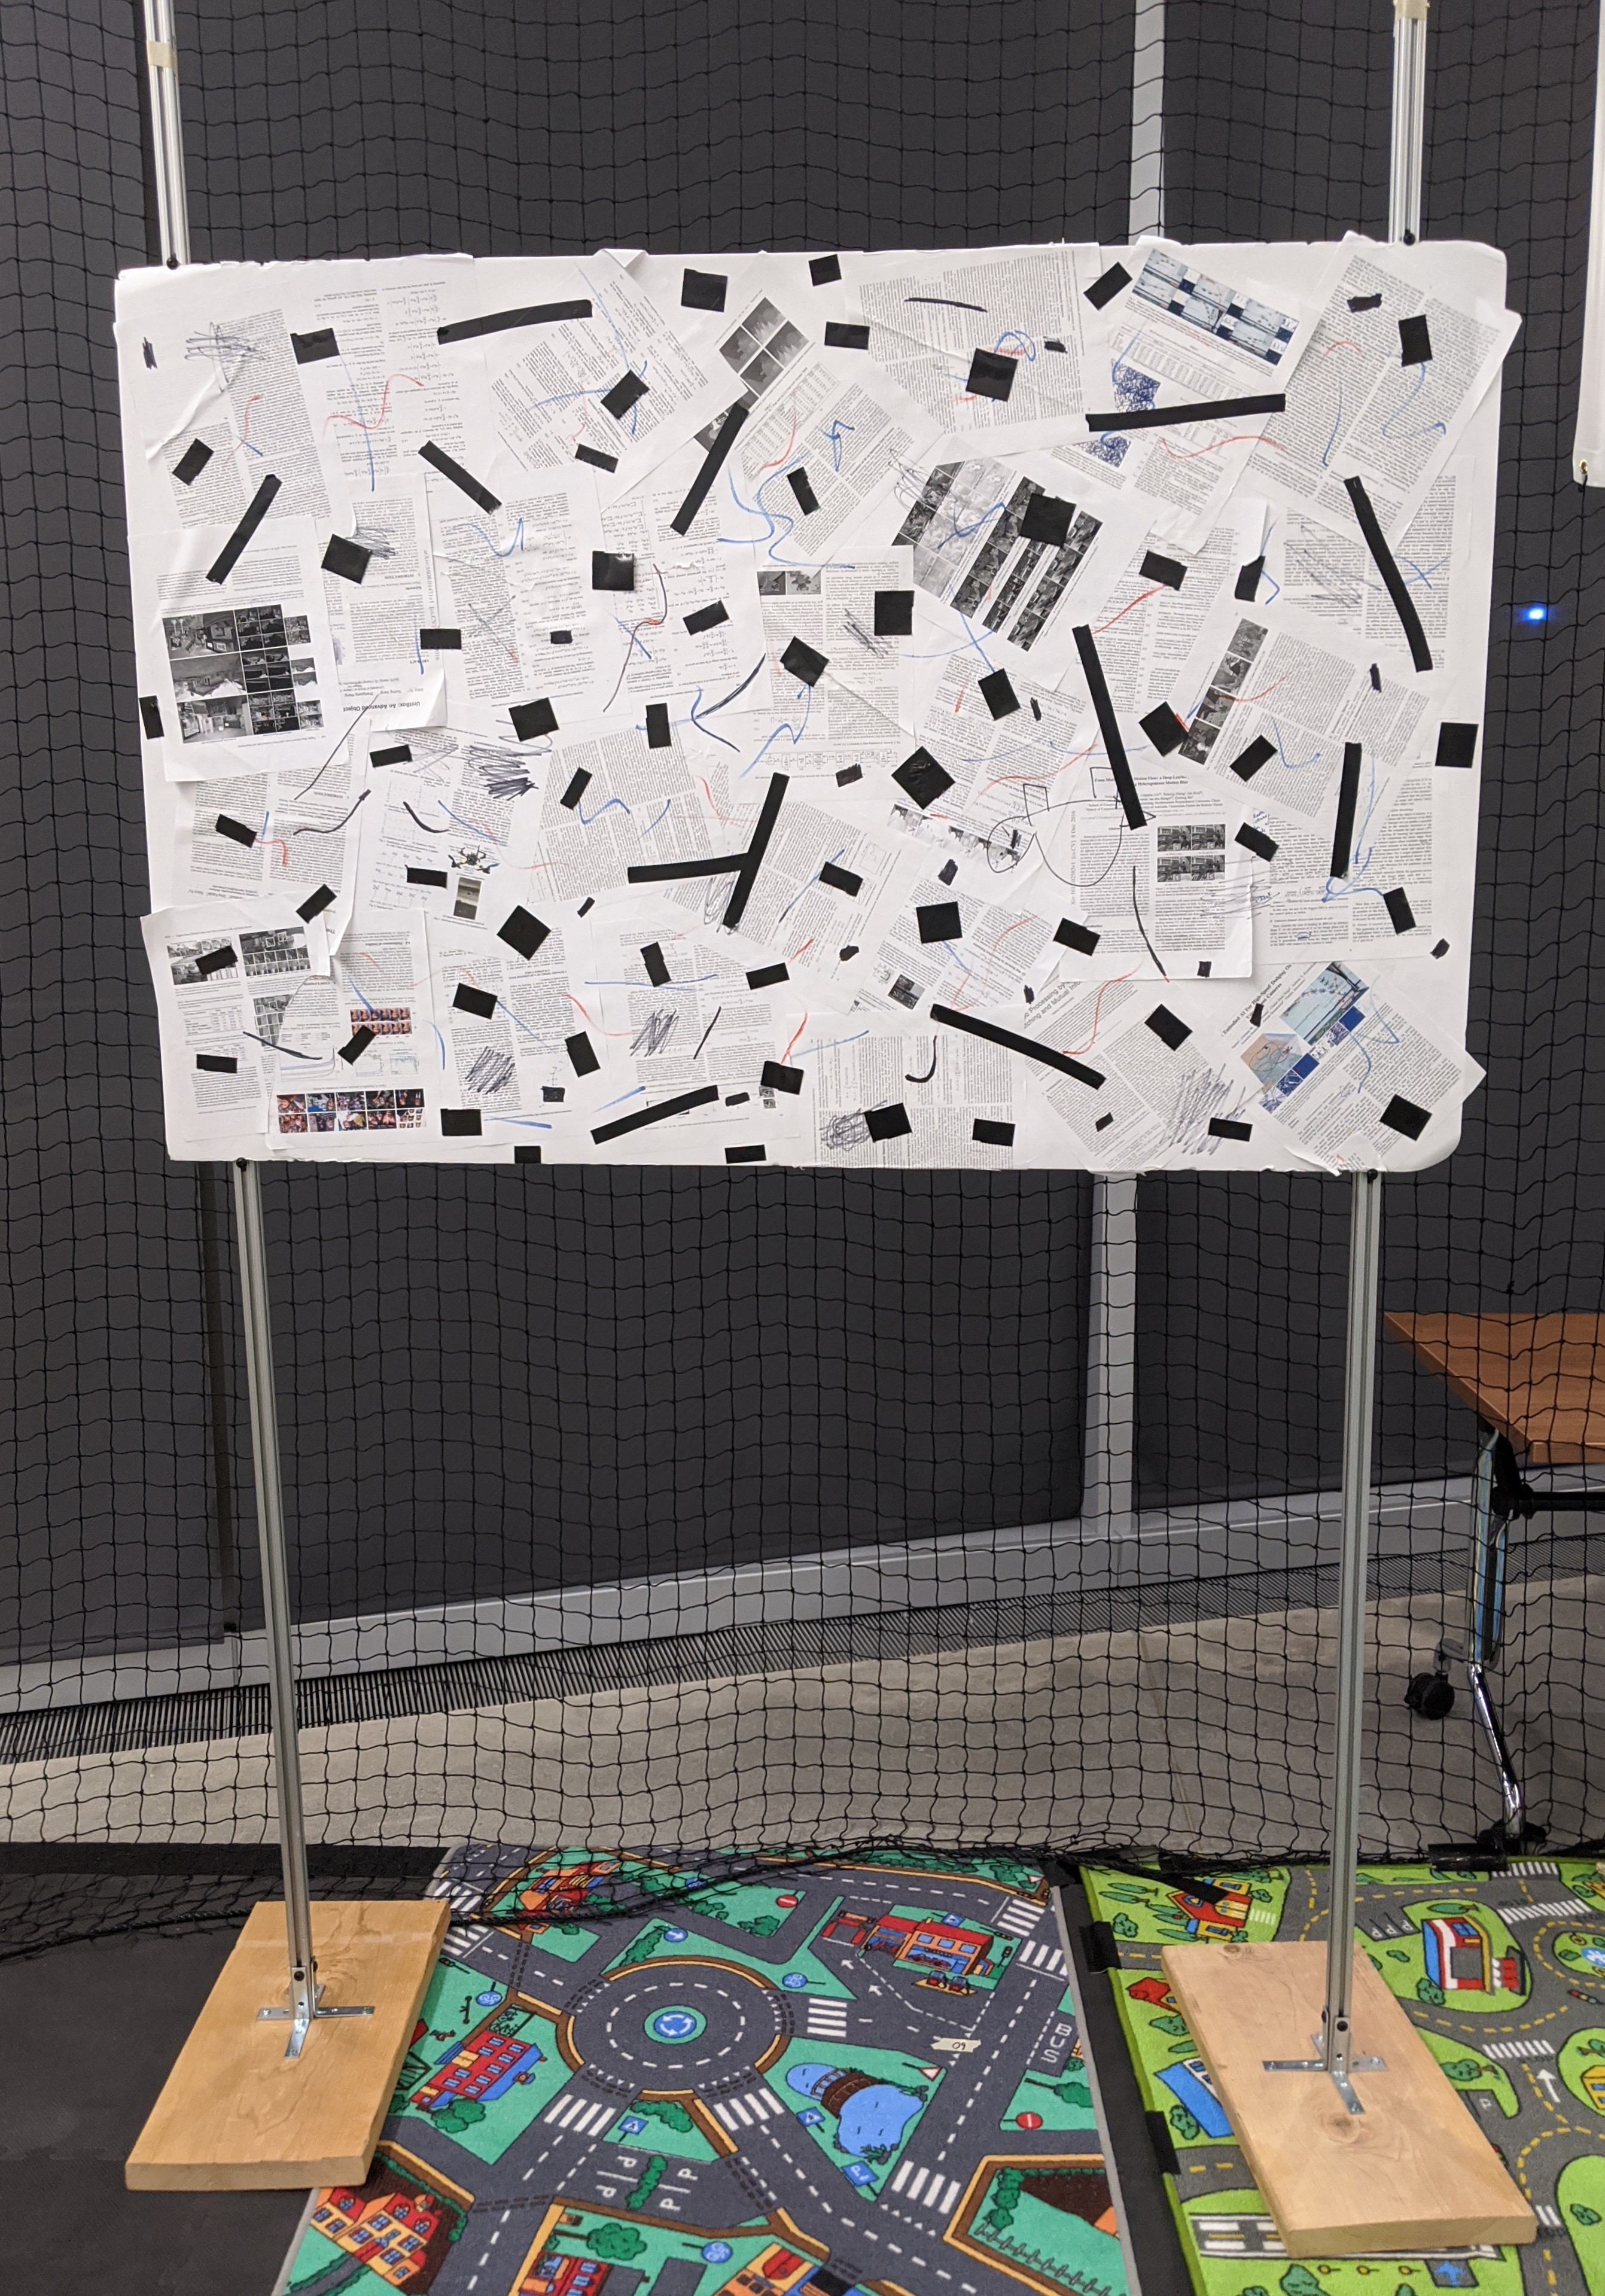
In the first stage, you take off from the helipad and you have to navigate though a wall on the floor, i.e., you have to fly over it. Note that the wall has features on it to help depth estimation. This is the same wall we used in project 4b. The sample photo of the wall is given in Fig. 2.
2.2. Window
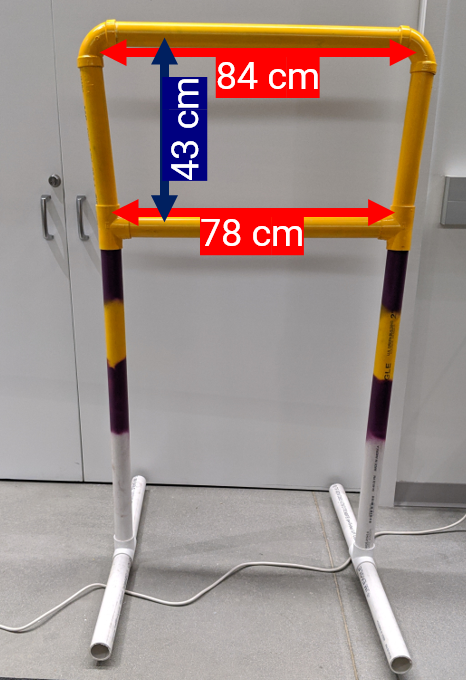
In the second stage, you have to traverse through a yellow window, this is the same window we used in project 3a. A sample photo of the window is given in Fig. 3. Remember that the window looks different from different viewpoints and changes in lighting. Here, the size, shape and height of the window are known. But the pose is only known as a gaussian distribution.
2.3. Bridge
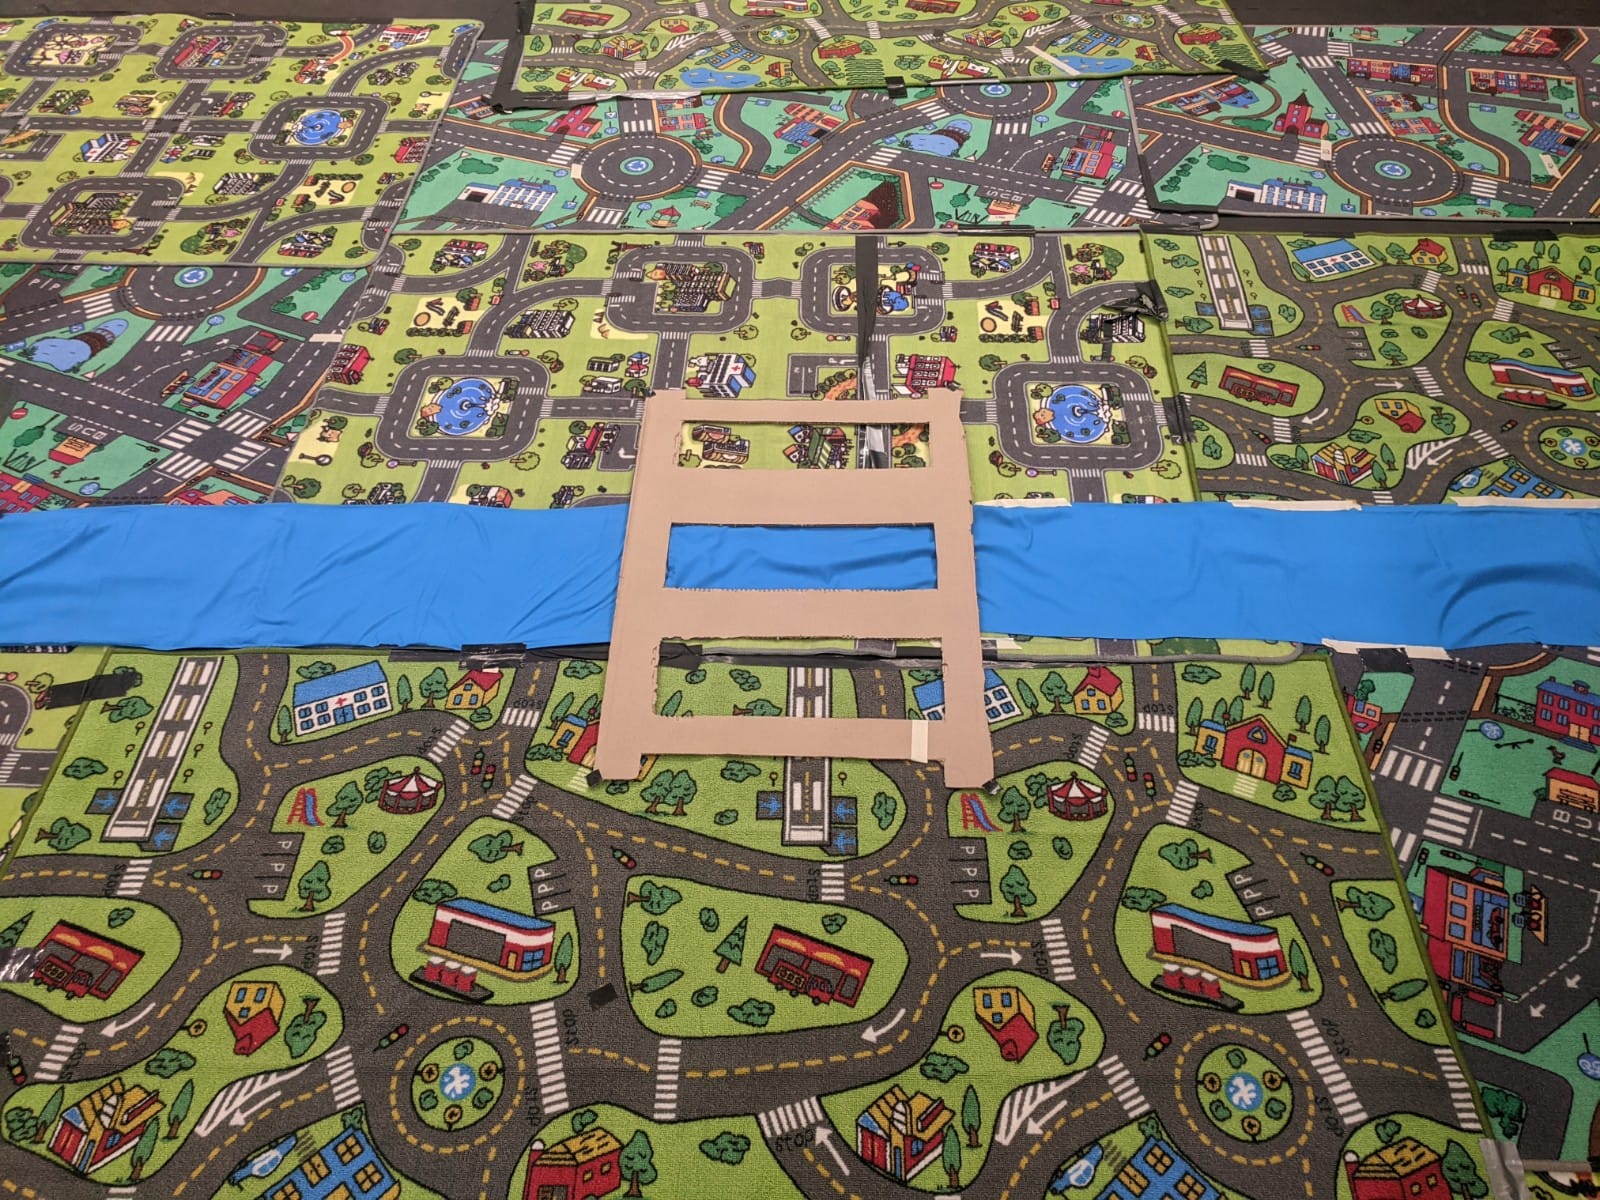
In the third stage, you have to fly over the bridge (atleast half of the PRGHusky has to be over the bridge to count as a success), this is the same bridge we used in project 4b. A sample photo of the bridge over the river is given in Fig. 4.
2.4. Circular Bullseye
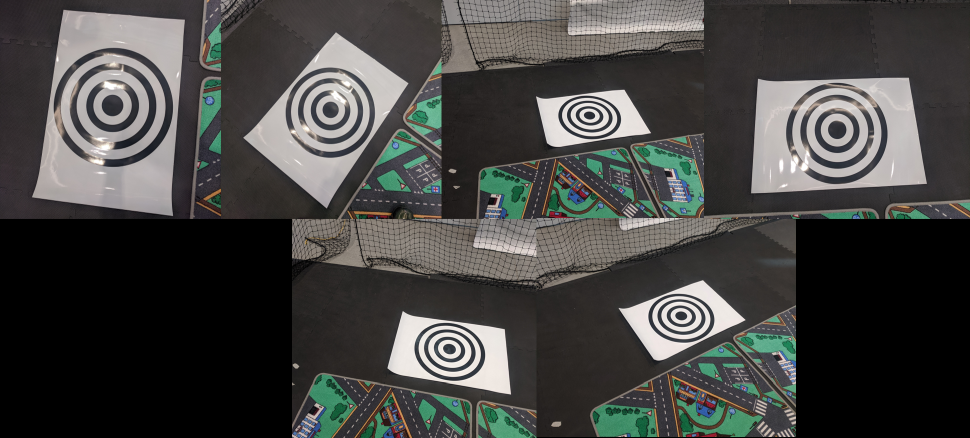
In the fourth stage, you have to land over a circular bullseye, this is the same bullseye target we used in project 3b. A sample photo of the circular bullseye is given in Fig. 5. As before, please print out your own bullsye tags for testing from here. Also, remember that the bullseye tag is reflective.
2.5. Wall Again!
In the penultimate stage, you take off from the circular bullseye and navigate through a wall again. This time the wall is up in the air, i.e., you have to fly below it. Note that the wall has features on it to help depth estimation. This is a wall similar to the one we used in project 4b.
2.6. Finish Tag
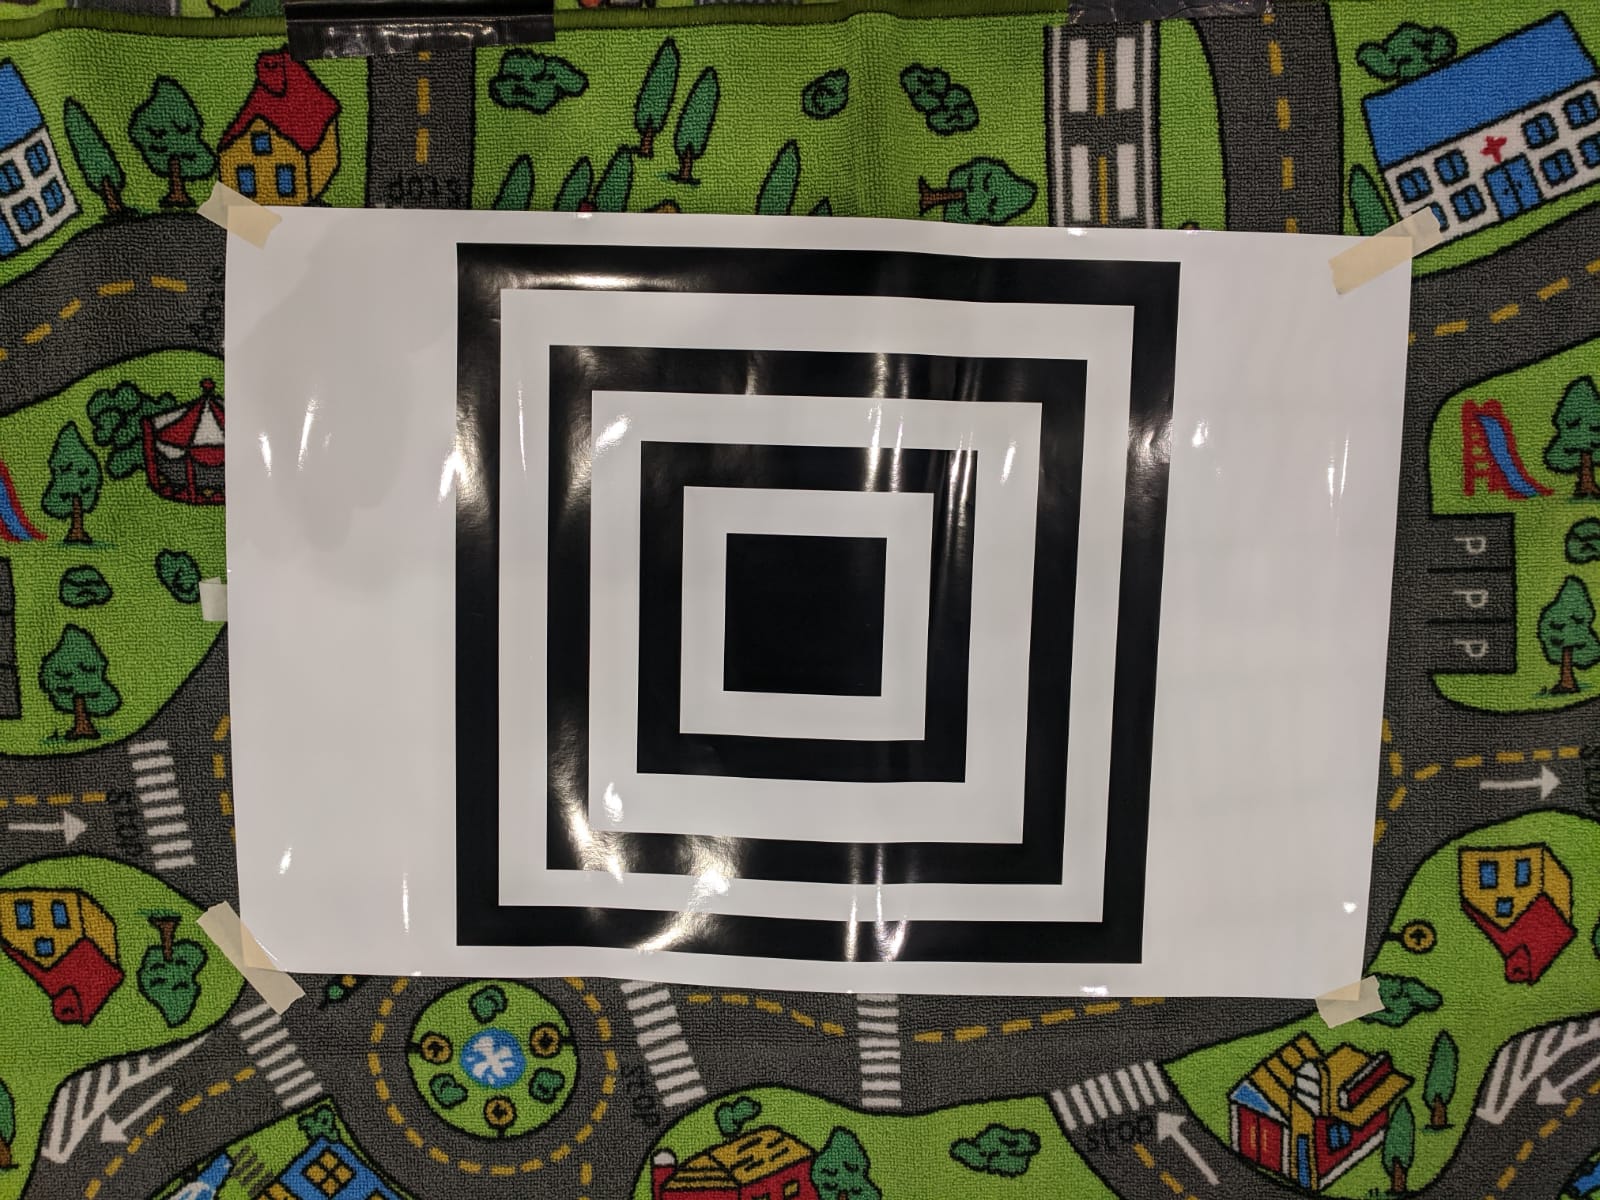
For the finish line, you have to land on a square tag. please print out your own square tags for testing from here. Also, remember that the square tag is reflective.
Congrats on finishing the course! Wohoooooo!
3. Attempt Termination
Doing any of the following will instantly terminate your attempt:
- Crossing the river at any time which is not over the bridge.
- Flying over a height of 2.5 m.
- Failing to navigate in any of the previous stages before proceeding to the next one.
- Crashing into any of the obstacles/track objects and/or the nets.
- Landing due to battery failsafe.
- Going over the maximum time of 2 mins per attempt.
4. Scoring Criterion
Taking off from the helipad gives the team 10 points and then crossing each stage of track will get the team 15 points, totalling a maxmimum of 100 points for each attempt. The team’s attempt will be terminated if any of the things mentioned in Section 3 happen. If the number of stages between two teams are tied, then the team with the lower time comes out on top.
5. D-Day of the Competition
On the day of the competition, the teams will go in the order of their team number. Each team will have a maximum time of 2 minutes per attempt and a maximum time of 15 minutes for all attempts combined. Between attempts, the team can use any amount of time (within the alloted 15 minutes of maximum time) to fix any software/hardware bugs or do changes in hardware/software (including change of batteries). Only the best trial will be graded.
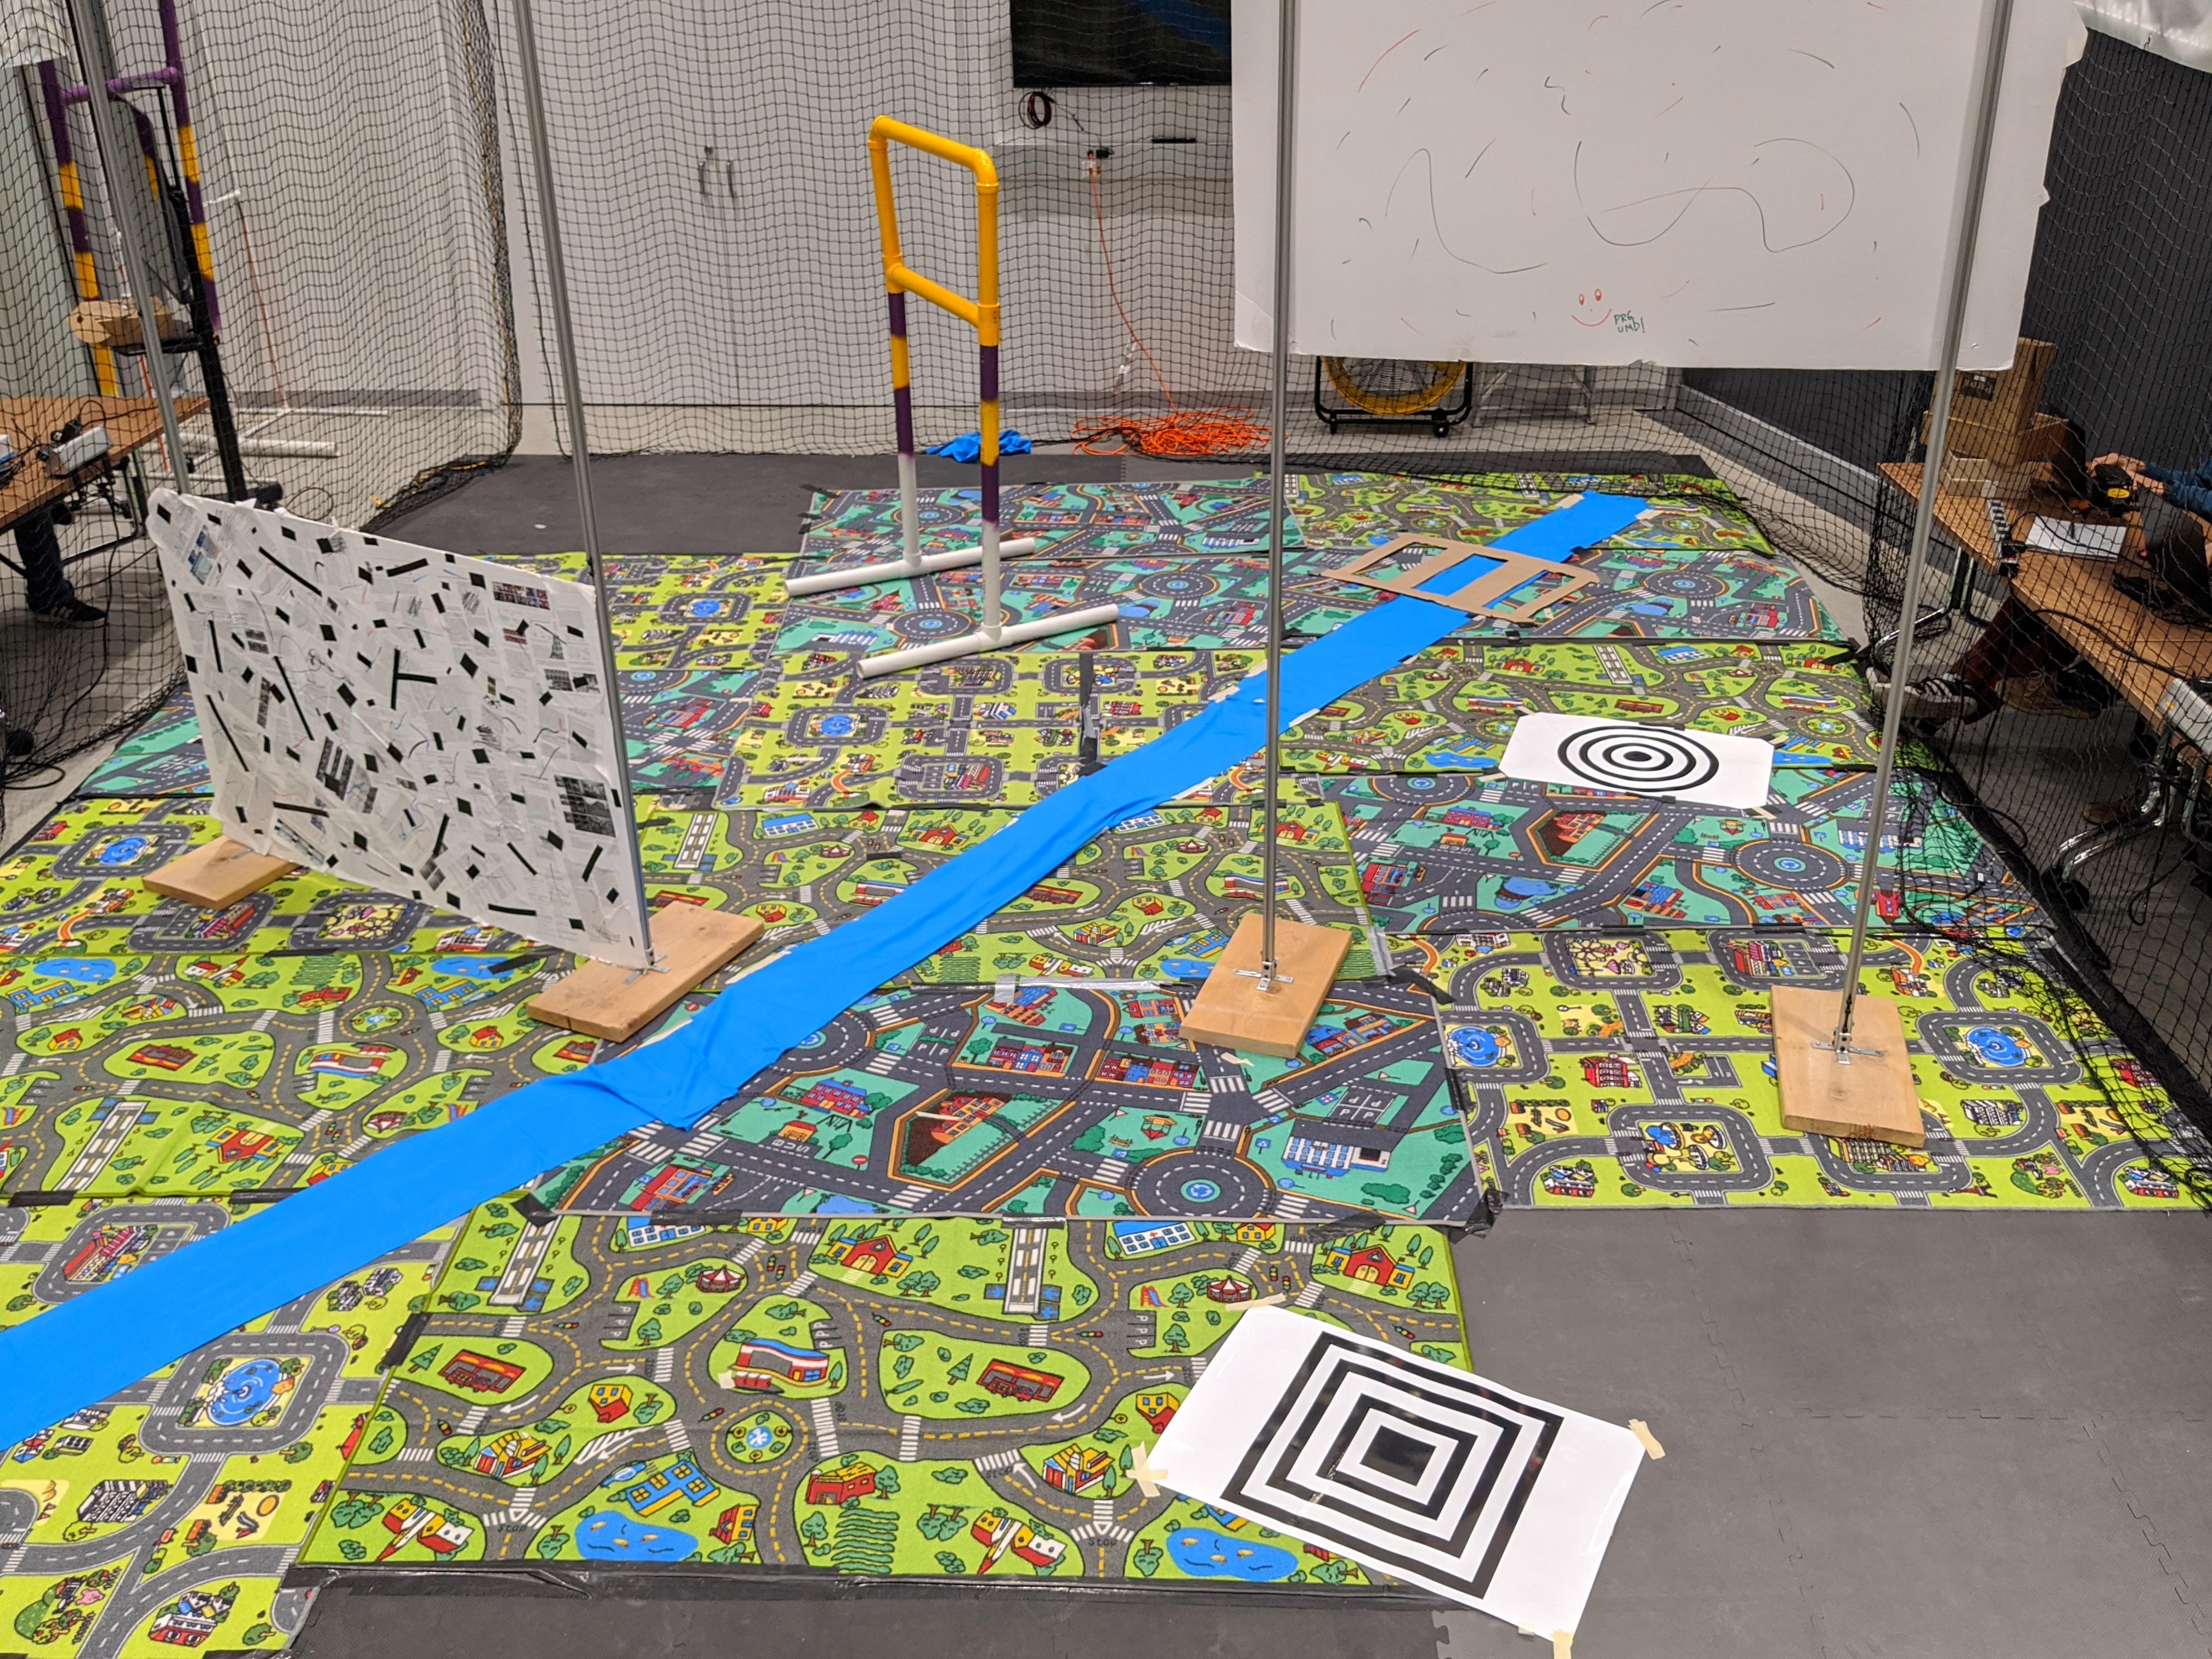
A sample photo of the real track is shown in Fig. 7.
Exactly 2 hours before the demo, each team can go and measure the distances in the track. No one will be allowed to enter the track 1 hour before the demo. The instructors will displace each obstacle randomly with a maximum disturbance of 60 cm in both X and Y directions (Z pointing up) and maximum orientation displacement of +/- 10 degrees.
The team with the highest points will win. Note that, completing the course (within the 2 minute slot per attempt) will get that team the maximum of 100 points.
The teams can place the quadrotor on the helipad in any desired orientation. Also, if a team wants to improve their live-demo score, they can request for an additional slot after all the teams have finished their demo with a penalty of 20 points of the total project 5 grade.
6. Implementation
This project is totally open! You can use any open-source code available online to solve any part of the problem. Make sure you CITE them. You are expected to use the implementations from the previous four projects but are NOT limited to it. You are NOT allowed to modify the PRGHusky platform. This includes adding/subtracting any sensors. Your results are ONLY limited by your imagination and creativity!
6.1. ROS Nodes
You need to create one or multiple ROS node(s) to run your algorithm for each task. You have to publish trajectory for the entire task as nav_msgs/Odometry (accumulated instantaneous camera pose).
6.2. Launch File
All the above ROS node(s) must be called using a single launch file.
6.3. Service Calls
Running a lot of nodes might be heavy for the Up board to handle. Service Calls in ROS are recommended.
6.4. Image Resolution
Depending on your algorithm, you would want to drop down the resolution of the image to make algorithm faster. Note that resizing the images will change the intrinsic calibration matrix.
6.5. Code Speedup
Wherever possible, try to use C++ or numpy functions to speed-up your computations.
7. Submission Guidelines
If your submission does not comply with the following guidelines, you’ll be given ZERO credit.
7.1. Report
Explain in detail your approach to complete the project, and describe any interesting problems you encountered and/or solutions you implemented. You MUST include the following details in your writeup:
- Your report MUST be typeset in LaTeX in the IEEE Tran format provided to you in the
Draftfolder (Use the same draft folder from P1) and should of a conference quality paper. - You need to submit an
mp4presentation video (atleast 1080p resolution and a maximum of 15 mins, preferably with the presenter’s face and slides) and presentationpdffile explaining your algorithm, implmentation-level details, how you overcame them and future scope. This is due at 11:59:59 pm on Dec 16, 2019.
7.2. File tree and naming
Your submission on ELMS/Canvas must be a zip file, following the naming convention TeamYourTeamNumber_p5.zip. If you email ID is 1, then the submission file should be named Team1_p5.zip. You can have any helper functions in sub-folders as you wish, be sure to index them using relative paths and if you have command line arguments for your Wrapper codes, make sure to have default values too. Please provide detailed instructions on how to run your code in README.md file. Please DO NOT include data in your submission zip file.
TeamYourTeamNumber_p5.zip
│   README.md
|   Your Code files
|   ├── Any subfolders you want along with files
|   Presentation.mp4
└── Report.pdf
8. Allowed and Disallowed functions
Allowed:
- ANYTHING IN THE WORLD!
Disallowed:
- ABSOLUTELY NOTHING!
9. Grading
The final grade for this project will be computed as follows: 70% of the grade is calculated from the live demo/performance on D-Day, 15% of the grade is given for the Report and the remaining 15% of the grade is awarded for the Presenation video.
10. Collaboration Policy
You are encouraged to discuss the ideas with your peers. However, the code should be your own team’s, and should be the result of you exercising your own understanding of it. If you reference anyone else’s code in writing your project, you must properly cite it in your code (in comments) and your writeup. For the full honor code refer to the ENAE788M Fall 2019 website.